Alongside other improvements to the XJRunner test setup, XJTAG v3.5 has a new interface to specify bus access from the test system using the XJRunner Setup screen. When you edit a test there is now a Bus Access tab on the dialog, which allows full control of which pins are used to read and/or write from a bus during the test.
The new mechanism to control bus access is much easier to understand and use, and gives more fine-grained control than the previous “Use Device” setup on the Categorise Devices screen.
If a bus can be accessed from more than one location (JTAG device(s), controllable logic devices, PIO pins on an XJLink2, or external hardware such as an ICT machine or flying-probe tester) then you can now specify which of the possible options is used to write to the net, and also which one is used to read from the net. The default is still to let XJTAG choose automatically. However, rather than the older “Use Device” functionality (which makes a best effort but if the user requests something that is not possible reverts to something that works), the new functionality will use the pin/device the user specifies and will stop with a runtime error if that is not possible. The new mechanism therefore gives better control and certainty of exactly how much of the board is being tested.
When editing a device test the Bus Access tab will display a tree on the left hand side displaying device busses.
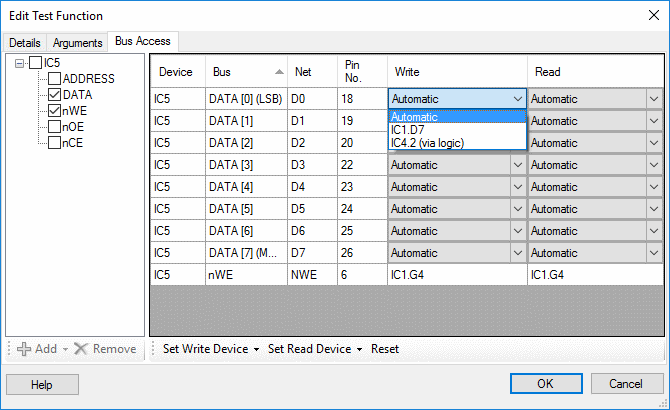
If a bus can be accessed from more than one location a drop-down menu allows you to select from the available ways to write/read the bus. Options are displayed in order of the priority XJTAG would use when ‘Automatic’ is selected.
Once an override has been applied a symbol is displayed next to the test in the test list as shown:

Note: you can verify that busses are being driven as you expect by enabling XJEase Debug output via the options on the Run Tests screen in XJDeveloper.
Leave A Comment