XJDeveloper 4.0 now has a brand new modern look to the Boards screen with 3 possible display modes: Tile mode, Row mode and Grid mode. The new interactive tile and row controls dedicate more screen space to each board so the data can be presented in a clearer, more readable display.
Left-clicking on a netlist, BOM or schematic path immediately opens the relevant dialog to edit the item, and right-clicking allows quick navigation to files on disk. In addition, for boards with an ODB++ netlist, new layout thumbnail images provide an easy way to identify your boards at a glance.
Alternatively, for those that prefer the classic look from XJTAG v3, Grid mode offers the existing compact tabulated board data. You can switch between all three modes using the buttons at the top right of the Boards panel. See below for a look at each of the options.
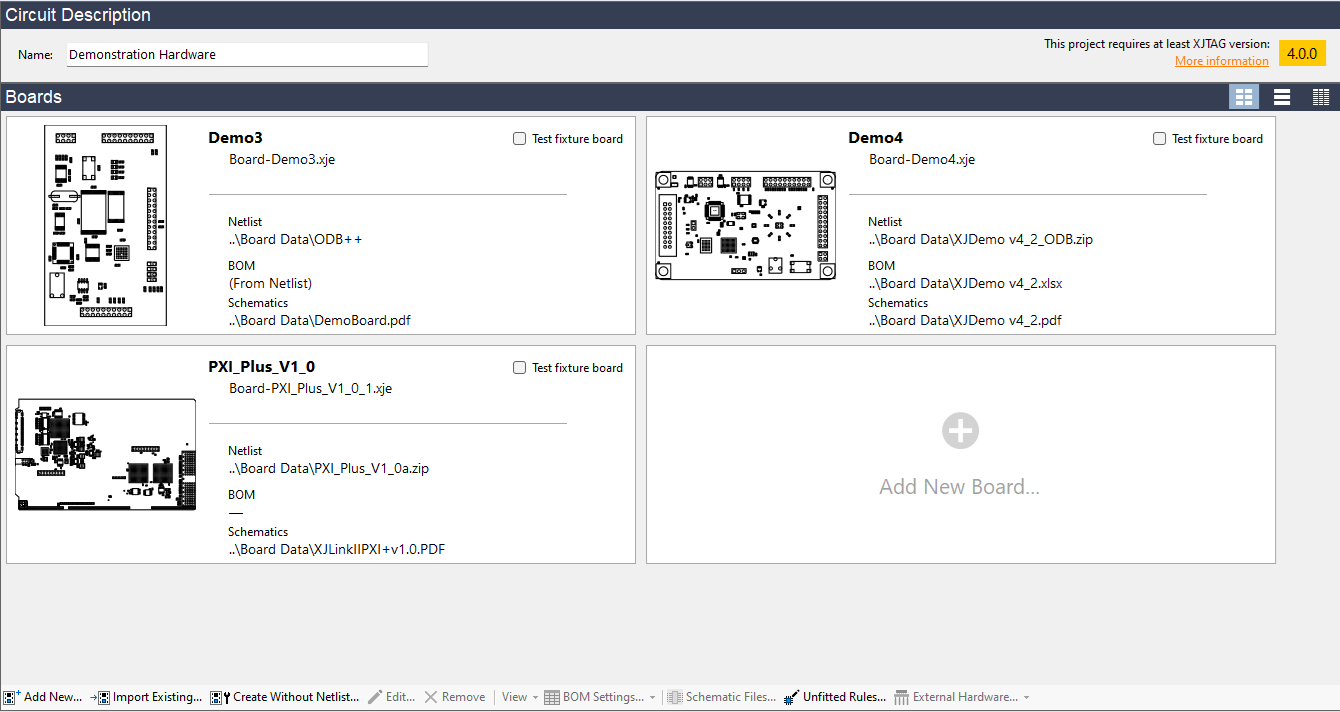
Tile mode
Tile mode dedicates the maximum screen space to the board icons allowing for a higher level of detail in the layout graphic – excellent if you have ODB++ data for your board or boards. Boards without an ODB++ netlist will show a stock icon with the netlist format listed in the bottom right.
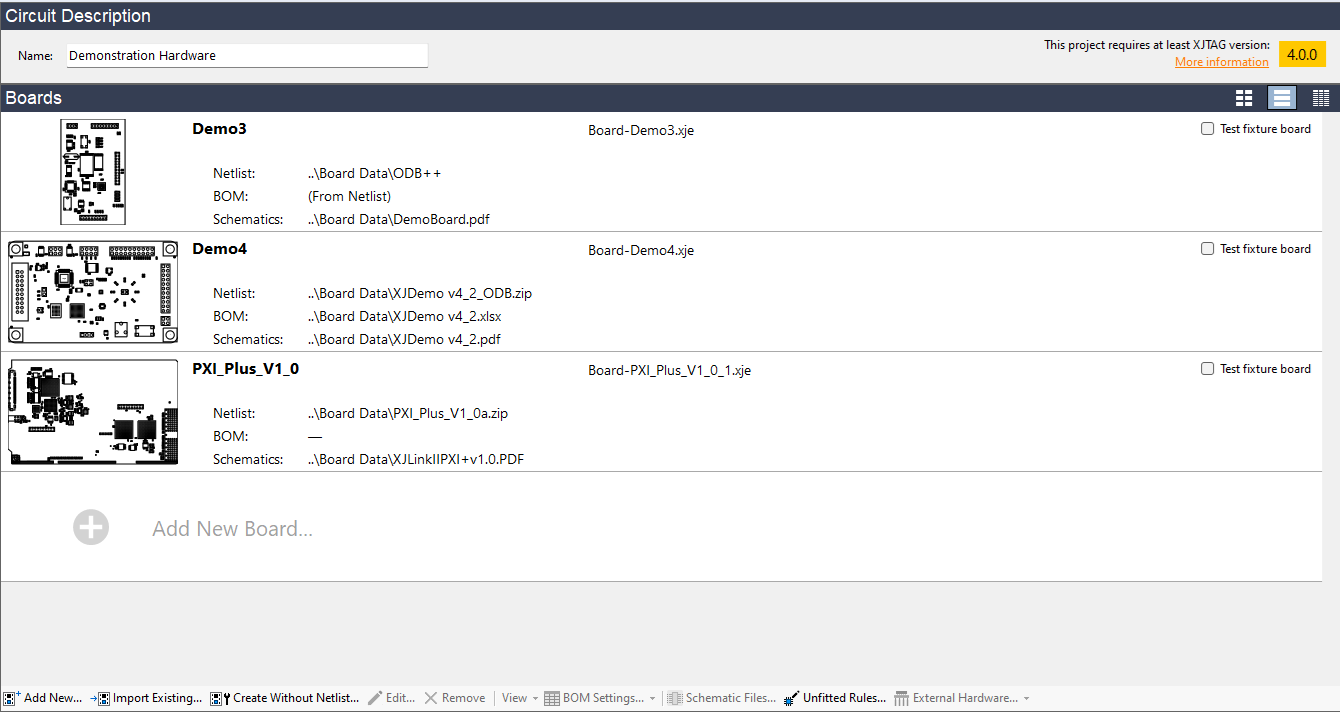
Row mode
Row mode provides a nice compromise between the more modern Tile mode and the classic look. This is the default display mode. Use of the whole screen width allows long file paths to be displayed in full without adjusting columns. The board icons are slightly smaller than in Tile mode but still sufficient to identify the outline of a PCB.
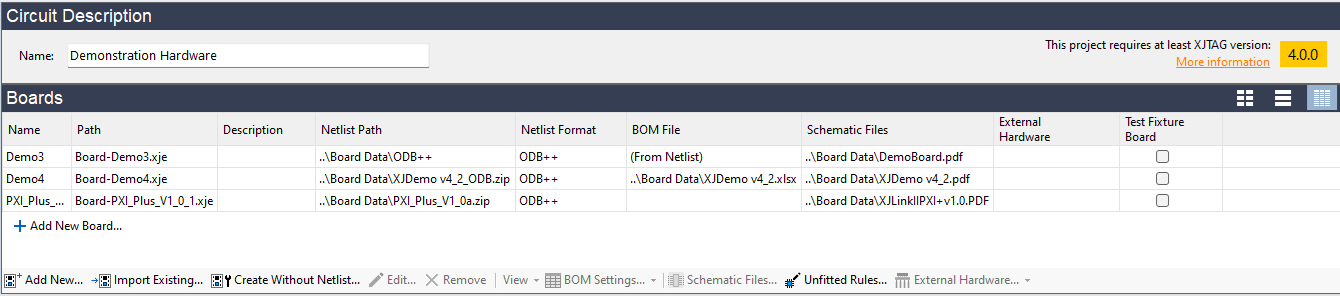
Grid mode
Grid mode keeps the classic look from XJTAG 3.13 and earlier. It is the most compact option, ideal for very large projects with 5 or more boards or when working on a lower resolution screen. Arranging board data in columns allows for easy comparison across a long list of boards.
Leave A Comment