XJTAG version 3.1 sees the introduction of a new application, XJInvestigator. This post aims to provide a quick tour of the application and its features.
What is it for?
XJInvestigator improves how XJTAG users diagnose faults on their boards. It is aimed at repair stations in production environments. User management is identical to XJRunner, allowing you to get up and running with the tool straight away.
Getting Started
After opening XJInvestigator, you are presented with a start screen. From here you must log in before going any further. NOTE: If your system is configured so that users do not log in, you will skip this screen.
Once logged in you can open a project. This will typically be a pack file containing the tests that failed on a board in production.
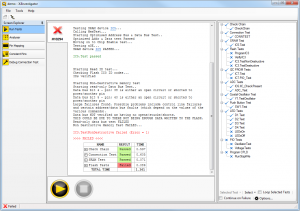
With a project open you will start with the Run Tests screen selected. Select the tests that failed in production, and run them again to reproduce the faults in XJInvestigator.
From this point, use the other tools to help diagnose faults.
Analyser Screen
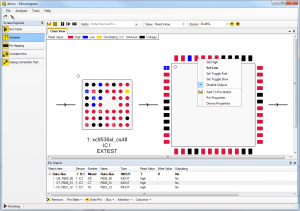
View live pin data for the JTAG devices on the board. Set pin states, and put devices into different modes (EXTEST, SAMPLE etc.). You can open this screen at the same time as the Run Tests screen so you can use the detailed errors from the runner output to determine where to investigate. You can compare the board with a known good board using Golden Scan. Finally you can program devices using STAPL or SVF files.
Pinmapping Screen
Use this screen to tweak the pinmap (change drive strengths for example). You can also use the Chain Debugger, for example to soak test the JTAG chain.
Diagnosing Connection Test Failures
If the connection test fails, there are 2 screens in XJInvestigator that may be useful.
Debug Connection Test Screen
Use this screen to help with broken chain errors from the Connection test. It helps you to find out which pin causes the problem so that you can find out whether the issue is of misconfiguration or a fault in the board.
Constant Pins
Using information from the Debug Connection Test screen, you can add constant pins to help the connection test to run. This will obviously not actually fix any faults, but can help in allowing you to run further diagnostic tests to see if other parts of the board are correct.
Layout Viewer
If you suspect nets are shorted together you can use the Layout Viewer to locate the likely locations on the board where the fault might be. This means you can then use other tools (visual inspection, X-ray etc) to find the fault quickly.
Netlist Information
Knowing more about the properties of the devices, pins and nets can help to diagnose faults. You can use the Schematic Viewer to search any PDF schematics for the boards, and use the Netlist Explorer to show the properties of parts of the board.


Leave A Comment