In previous versions of XJTAG the JTAG chains in the circuit were all operated at the same frequency. Because the Optimised Scans feature in v4.0 now allows a different frequency to be set for each chain, some changes to the user interface were required, and as a result the chain frequency settings in the user interface have moved in v4.0.
Optimised Scans – TCK frequency per-subchain
With Optimised Scans enabled, each JTAG TAP or subchain has its own default target TCK set based on the BSDL files of the JTAG devices within that chain. This can be adjusted per-subchain by going to the Pin Mapping screen and opening the Advanced Configuration Options tab. Within this tab the Subchains grid displays the target TCK for each subchain.

This can be modified directly in the grid by double clicking on the value, or by opening the add/edit dialog for the subchain. The Get Max TCK operation in the chain debugger found in the bottom half of the screen below the Advanced Configuration Options tab can also systematically test the speed each subchain can achieve, print the maximum values it finds, and save those values to the target TCK for each subchain in the Advanced Configuration Options tab.
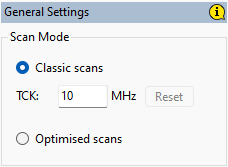
Without Optimised Scans – global TCK frequency
If optimised scans is not enabled then all chains run at the same frequency. This frequency is also now configured from the Pin Mapping screen and again it is on the Advanced Configuration Options tab – but this time it will be on the left of the screen.
Overriding the TCK frequency
The Options button on the Run Tests screen (or in XJRunner) at the bottom of the test list has a “Set Frequency” tab (subject to XJRunner users having sufficient privileges) which allows the frequency to be temporarily overridden. If the Optimised Scans feature is enabled then a frequency can be set for each chain, if not then a single frequency can be set. The value set here is only kept until the current project is closed, and does not persist between sessions.
Leave A Comment