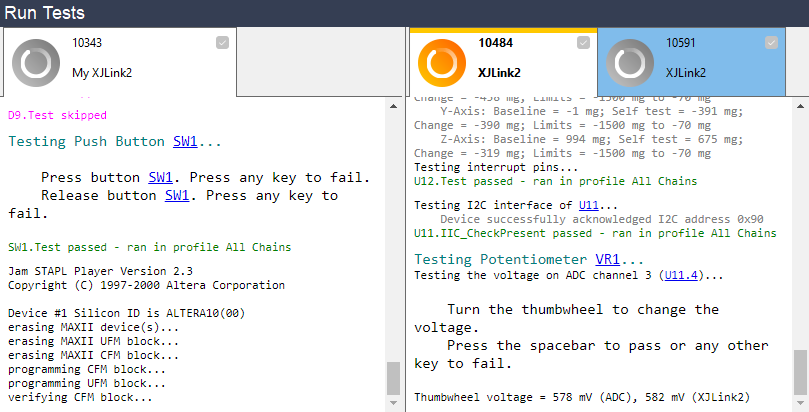
In XJTAG 4.0, you are now able to rearrange the tabs in XJRunner so that you can see output from multiple XJLinks at once. The tabs also display more information about the corresponding XJLink than in previous versions of XJTAG.
As previously, the tabs will appear in order of XJLink serial number by default. However you can now click and drag any of the tabs in order to dock it in a new location, such as side-by-side with another tab. The image below shows an example of how to move the tabs around, and the resulting arrangement can be seen in the final image further down.
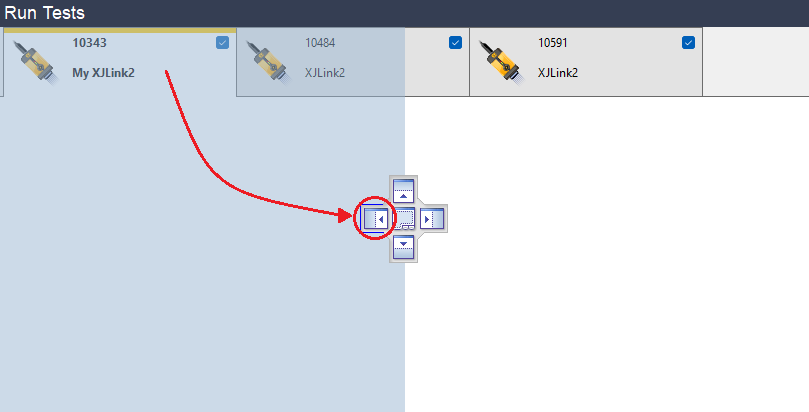
Only one tab will be considered the “active” tab at any one time, and this can be distinguished by the yellow bar across the top of the tab. In the image below, the tab for the XJLink with serial number 10484 is the active tab.
When inactive tabs require attention from the user, they will flash blue as shown in the image below – this behaviour is unchanged from previous versions of XJTAG. For example, if a test involves showing a dialog, then the dialog would appear immediately for the active tab, but inactive tabs will instead start flashing and wait until they become active to show any pending dialogs.
You can change which tab is active by clicking anywhere in an inactive tab to activate it, or by using the Ctrl+Tab keyboard shortcut to switch between the tabs.
Leave A Comment