With the introduction of External Hardware per Subchain in XJDeveloper v3.9 it is possible to write a test that powers up your board using your XJLink2 to directly control the IIC pins before the JTAG chain is operable. Following is an example of how to set up this test in your project:
First, in your pin mapping, define the XJLink2 pins which are connected to the IIC pins of the board to be of type “PIO” (programmable in/out) and give them suitable names (SCL and SDA).
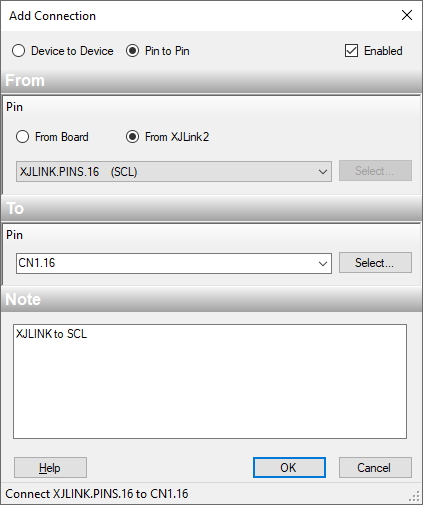
Then. from the connections screen add the connections between your XJLink2 and the board:
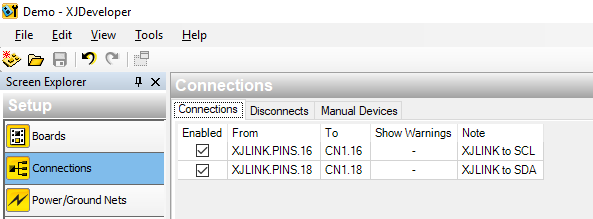
Now these connections have been defined, all the XJLink2’s PIO pins are treated as External Hardware pins.
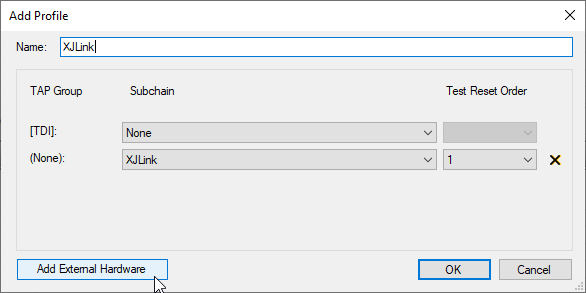
From the JTAG Chain screen, goto Configure Profiles then create a new Subchain containing just the XJLink2 External Hardware and no TAP group:

It is important that no TAP group is selected because this means access to the hardware at runtime will not attempt any JTAG setup (like checking the chain, counting JTAG devices or performing autoskew).
Create a Profile that uses just this External Hardware Subchain:
You now have a Profile that will only use the XJLink2’s PIO pins to read and write to the circuit using standard SET statements. Any SET statements that require JTAG pins will not work in this Profile.
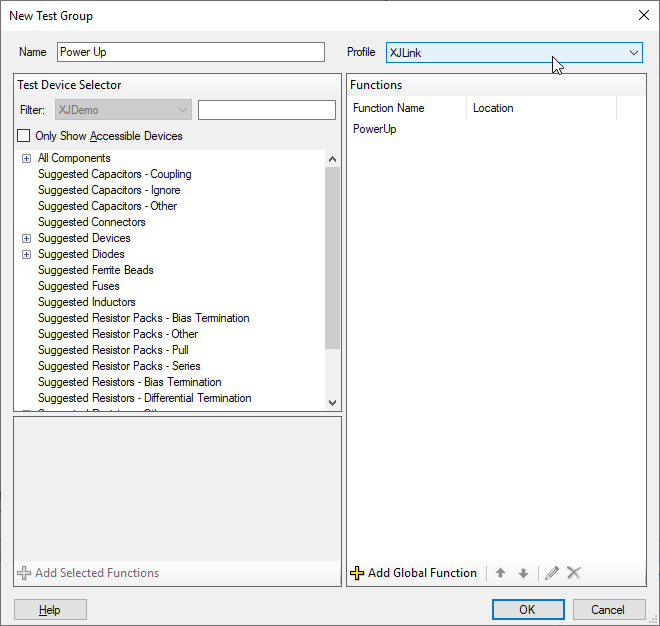
Write your I2C test to power up the board. When adding the test to the Runner Setup screen, select the External Hardware only Profile:
Your test will now run using only the XJLink’s PIO pins without any JTAG checks or scans being performed.
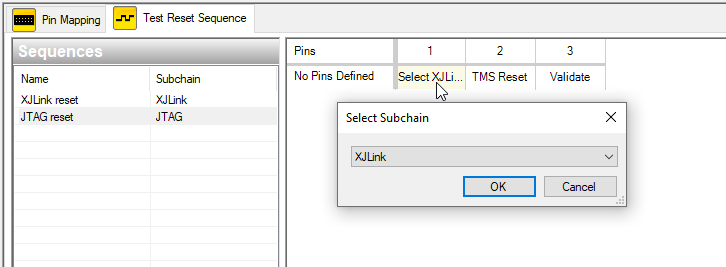
If you would rather have the PIO only power up performed on startup of a standard JTAG chain profile, this can be done using Test Reset Sequences. Firstly add a Select Subchain step to the start of your JTAG Subchain’s reset sequence that selects the External Hardware Subchain:
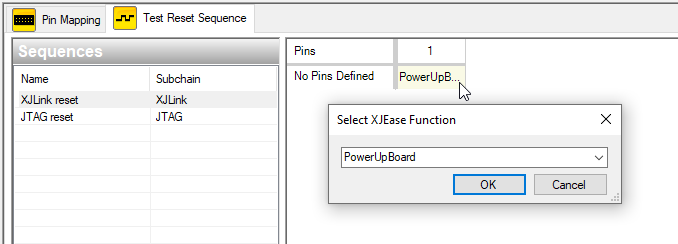
Add an XJEase call in your External Hardware Subchain reset sequence to run the I2C power up code:
For further information on Dynamic Chains, see the help files installed with XJDeveloper.
Leave A Comment