
XJTAG 4.3 adds support for using some devices produced by Future Technology Devices International (FTDI) as JTAG controllers in place of an XJLink. There is no additional licence required to use FTDI devices, and therefore existing customers can utilise this new functionality immediately in new projects if suitable hardware is available.
The following devices are supported:
- FT232H: FT232HL, FT232HQ, C232HM cables
- FT2232H: FT2232HL, FT2232HQ, FT2232H-56Q
- FT4232H: FT4232HL, FT4232HQ, FT4232H-56Q
These devices have some additional limitations compared to XJLink controllers. For example, FTDI devices only support certain TCK frequencies up to a maximum of 30MHz, and only support the following pin types: JTAG signals, PIO, High, Low and Input. Further, XJTAG will only use a single channel of a single FTDI device at a time, meaning that you can only connect to one JTAG chain on a single UUT at a time (i.e. group testing mode in XJRunner is not supported). This also means that there are fewer configurable pins available in total than with an XJLink controller.
Setting up an XJDeveloper project for use with an FTDI controller
You can add a pin mapping for an FTDI device to an XJDeveloper project by going to the Pin Mapping screen and selecting “Add XJLink Type”, and then inputting some more information about the exact FTDI device that you want to use.
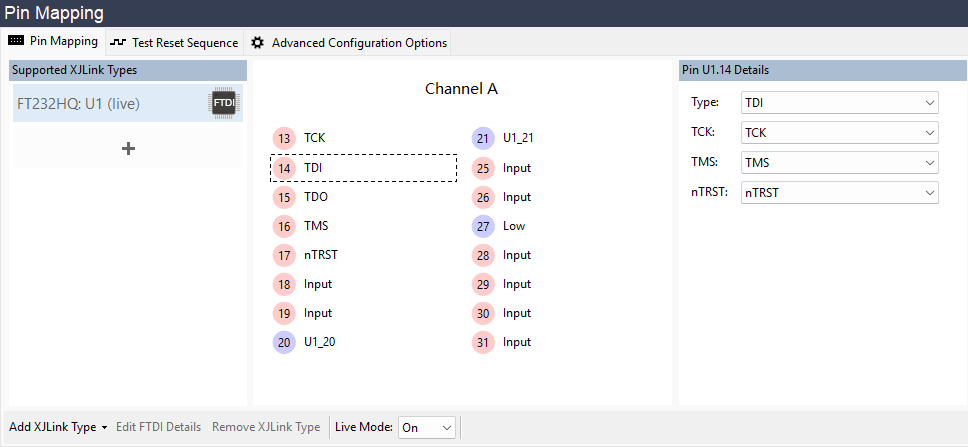
If the FTDI device is mounted on the board that you want to test, then you can select the corresponding device in the netlist and XJTAG will immediately know how it is connected. If you are using a C232HM cable, you will have to physically connect its pins to your board and then add these connections to the project in the XJLink Connections section of the Connections screen, as shown below – this is the same process as for setting the project up for use with an XJLink.
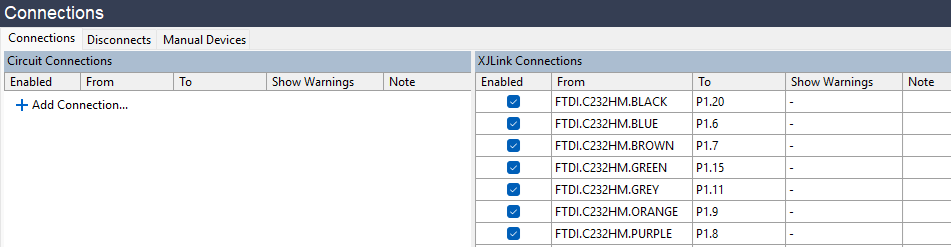
After setting up the pin mapping and any connections, the project will be ready to use with the FTDI device as a test controller and you can run tests by connecting the FTDI device to your PC directly via the board’s USB socket, instead of connecting the board to an XJLink controller.
Leave A Comment