The big new feature in XJTAG 3.10 is Revisions support. We will be posting a 3 part blog series to go in to detail on how it works and how it can help you save time in your board setups.
What is a revision?
Firstly what do we mean by revision? A revision in XJTAG is defined as any design update to a UUT that requires modifications to the associated XJDeveloper project. In the past this often meant starting from scratch with a new XJDeveloper project especially if nets or devices on the board had been renumbered as part of the revision. But no more! The new revisions feature is launched from your old project, you supply a new netlist or ODB++ (and/or BOM and schematic) and XJDeveloper makes a brand new project for you with most of the setup completed automatically.
An intelligent device matching algorithm is used to match categorised devices in the source project to the corresponding device in the revision even when the reference designator has changed. All matches are displayed in a user-friendly checklist format for you to review. Matches which the algorithm is very confident about are applied automatically (but can be undone); others are presented as suggestions which you can either accept or reject. By simply stepping through the Revision Checklist you can ensure all the setup from the previous revision is carried across to your new project so you can focus on setting up tests for any new parts of the circuit.
Creating a revision
A new revision is created by selecting the option on the File menu in XJDeveloper which opens the New Revision Dialog.
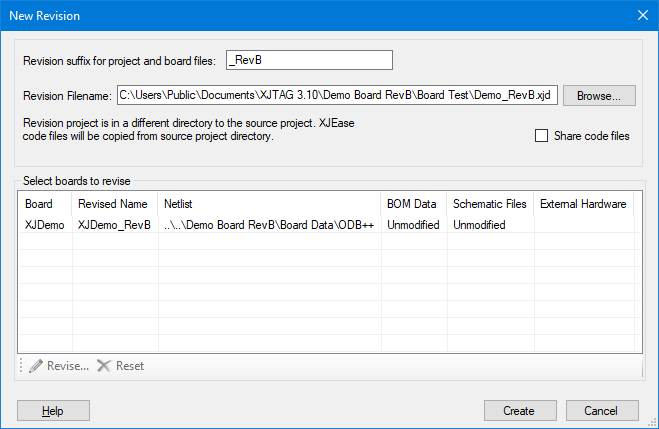
Here you can choose where to save your new revised project and enter a new netlist, BOM or schematic for each board in the project to be revised. You can also optionally supply a suffix to apply to the end of the project and board files (eg. _RevC) to help keep everything organised.
There are two options for the hierarchy of a revision project and its source project:
- Shared code – All XJEase code files are shared between the two projects so code changes in one project are reflected in the other. The revision project can be in the same directory as the source or a different directory.
- Copied code – All XJEase code files are copied when the new project is created and are then edited independently. The revision project must be in a different directory to the source project.
When a new revision is created, the current project will immediately close and the new project will open, triggering the revision setup process. Revision projects start out with none of the devices categorised but almost all the other setup is copied from the source project. So the XJRunner test list will already be populated, although obviously unable to run until all the test devices in it are setup. As such, it is normal to have large number of errors when you start a new revision project but completing the revision setup process should clear them.
Find out more
For more information on the revision setup process and how the device matching works you can read the other blog posts (part 2, part 3) in the series, which will be published over the next few weeks. Alternatively, full details of the feature can be found in the XJTAG help for XJDeveloper in the “Revisions” chapter.
Leave A Comment