Note: This post was published in 2009 and was therefore accurate in XJTAG version 2.2.
An updated version of this post is available here and should be used with XJTAG version 3.x.
This post describes debugging the Connection Test from XJDeveloper.
The XJTAG connection test is an automated interconnect test which checks for shorts, opens, stuck high and stuck low errors on a circuit board. Some circuit boards have cross-talk or similar issues, which do not affect the normal running of the board, but are picked up by the XJTAG connection test.
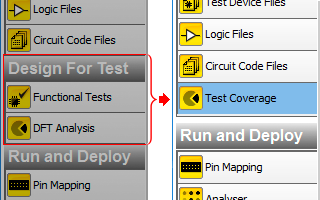
The Connection Test screen is in the Run and Deploy section of XJDeveloper. It adjusts how the XJTAG connection test runs. If the connection test works for your circuit, it’s probably best to just leave that screen on its default setting, with the “Configure Connection Test” checkbox left unchecked.
“My Connection Test Fails!”
There are two distinct types of way in which the connection test can fail.
- The connection test finds fault(s) with your circuit, and prints a message saying the type of fault it found and the net(s) it found the fault on.
- During the test, the JTAG chain stops working. This causes the connection test to fail, typically producing a large amount of output with a “The JTAG chain appears to be broken” message at the end of it.
Type (1) is the sort of failure normally associated with a fault on the board which needs investigating. How to go about this, and how to deal with suspected false failures will be the subject of a future blog post.
Although type (2) could be caused by this, it is more normally seen during set-up and implies that the XJTAG system doesn’t know something it needs to. This would typically be :
- a) A missing “disable value” – typically something like a reset pin which XJTAG needs to be told to hold at a constant value to avoid resetting the board
- b) a watchdog chip that hasn’t been disabled
- c) XJTAG causing something to draw a current which causes a voltage drop, which in turn stops the JTAG chain operating. This may be caused by a power supply with a limit set a bit low, or may be due to XJTAG not being told of a connection or required constant value pin.
Fixing a ‘broken chain’
To track down these types of problems, turn on “Configure Connection Test” and set the Connection Test Type to “Debug Errors”. The next stage is to find out exactly what breaks the chain, and it’s a matter of stepping through the possibilities.
A “Debug Errors” connection test starts by putting all the nets into one state, and then switching them one at a time until they all arrive at another state. In your case you are looking for the place where it fails when trying to do this. There are 3 starting states and 2 finishing states, so there are 6 tests to run. Because it may be a one-directional problem (ie the problem happens when netA is low and netB is high, we also have a “direction” flag (giving another 6 test situations) if the first 6 don’t find a problem.
What you are looking for is the chain to break as it does during the normal test. This will cause a large amount of data to scroll past, and at the bottom again it says “The JTAG chain appears to be broken”. The following line will give you a pointer to the problem. It will say something like “A problem occurred whilst setting net NET23 high.” This is the place to start looking. What does that net do? Should it be kept at a constant value? Are there any resistors on that net that haven’t been properly defined? It may be worth setting the “Wait for keypress” option so that you can press a key to step through each net in turn.
Whichever options you choose it is often worth watching your board as the tests run, to see if the current demand surges or reset lights flash on, etc.
If you can’t reproduce the fault using the 12 tests above, then it may be that more factors are involved. There is a further option in the Connection Test settings to use a random setting algorithm. Check that box, start the connection test running, leave it while you go to a meeting, make a coffee, etc while it works.
It is also worth mentioning that the help in XJDeveloper gives details of each of the settings available in both modes.
Further information is also available on the XJTAG support pages in the “Application Notes” section.


Leave A Comment