Much of the content in the XJRunner .NET Integration is also relevant to the XJAnalyser .NET Integration, which is new for XJTAG 3.9. Therefore we have taken the decision to combine the two into a single new assembly, XJIntegration, which means that resources can be shared between the two integrations, and allows them both to be used in the same application if required.
For example, you could use the XJRunner Integration to run boundary scan tests on your circuit board, and then use the XJAnalyser Integration to hold pins in a known state or monitor pin changes whilst using external test equipment to run supplementary tests.
Old projects using the XJRunner .NET Integration will need to adjust their DLL references to use XJIntegration.dll instead of XJRunnerIntegration.dll. Here we will detail how to do this for C# and LabVIEW projects.
C#
- Copy XJIntegration.dll from the XJTAG Bin directory (usually either C:\Program Files (x86)\XJTAG 3.9\Bin or C:\Program Files\XJTAG 3.9\Bin for XJTAG 3.9) to your project directory, alongside the .csproj file. Then replace the old reference to XJRunnerIntegration.dll with a new reference to XJIntegration.dll, setting CopyLocal to True.
- Where files contain using statements referencing the integration, replace XJTAG.XJRunner.Integration with XJTAG.Integration or XJTAG.Integration.XJRunner as required.
- Replace all references to the old Project class with RunnerProject references.
- Run a full Rebuild of the C# solution by clearing the contents of the project output directory and then clicking Build in Visual Studio.
Other .NET languages in Visual Studio will follow a similar procedure.
LabVIEW
In LabVIEW projects, every VI containing any nodes which use the XJRunner Integration will need to be updated. Start by updating any SubVIs which are used in other VIs:
- When the VI is loading, if the previous version of XJTAG has been uninstalled, LabVIEW displays a dialog explaining that it can’t find XJRunnerIntegration.dll, asking for the new location. Click Cancel here, since the new DLL has a different name. If the previous version of XJTAG has not been uninstalled, continue to the next step.
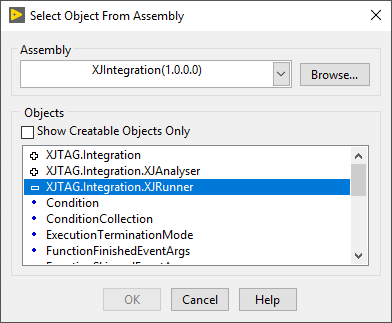
- For every input and output terminal on front panel of the VI that is a .NET refnum, check whether it is an XJRunner Integration type. If it is, then right-click the refnum, then choose Select .NET Class and click Browse…. Click the Browse… button on the dialog, and select XJIntegration.dll inside the XJTAG Bin directory (usually either C:\Program Files (x86)\XJTAG 3.9\Bin or C:\Program Files\XJTAG 3.9\Bin for XJTAG 3.9). Then choose the required class in the bottom part of the dialog.
- If the front panel contains an XjtagOutputBox control, you will need to re-select its type in a similar way to the previous step. Right-click on it, and select Insert .NET Control…. Browse to the XjtagOutputBox in the XJTAG.Integration namespace within XJIntegration.dll.
- On the block diagram, find any .NET constructor nodes for XJRunner Integration types. These will need to be re-selected by right-clicking and choosing Select .NET Constructor. Browse to the correct type in XJIntegration.dll as described above. Do the same for any static invoke or property nodes in the block diagram.
- Use the Error List window (accessed through the View/Error List menu item) to determine which further nodes should be re-selected. For each “Invalid property” error or similar in the list, re-select the property by clicking on the property name on the node and re-selecting the property from the dropdown.
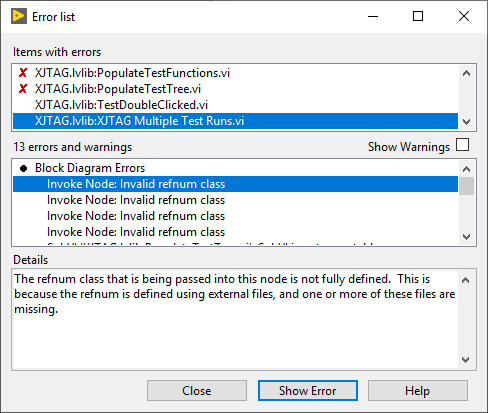
- When the only remaining errors for the VI are “SubVI is not executable”, continue onto the next VI in the project and repeat this process from the beginning.
- If at this point XJRunnerIntegration.dll is still in the project dependencies (under Dependencies in the Project Explorer window), right-click it and select Why is this item in Dependencies?. Open VIs which appear in this dialog, and first re-select all XJRunner Integration nodes, and then all .NET nodes linked to the XJRunner Integration nodes (including null .NET refnums and event parameters).
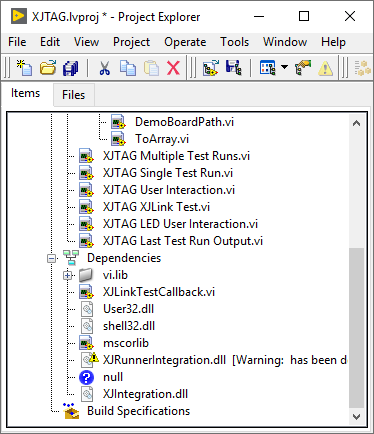
After completing these steps, only XJIntegration.dll – not XJRunnerIntegration.dll – should appear in the LabVIEW project dependencies.
Leave A Comment