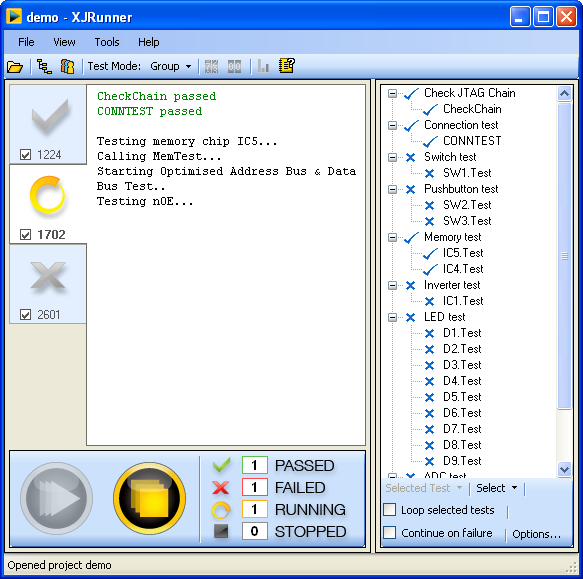
If you have multiple XJLinks plugged into your machine, the main testing screen of XJRunner enables you to test multiple boards simultaneously. From XJTAG version 2.3 we have increased the flexibility of this by introducing two different test modes. This post highlights Group mode. Independent mode will be covered in a future post.
Group mode
In this mode the XJLinks operate as a group. You can select which units to run tests on by ticking the checkboxes on the corresponding tabs. Clicking the Run button on the screen will start tests simultaneously on all of the selected XJLinks as a group. If there are XJLink2 units among the selected XJLinks, you can also start testing by pressing the Run button on any one of them. More tests can be run on all the units only after the whole group has finished or the Stop button has been pressed on-screen.

While tests are running, the XJLinks cannot be selected or deselected, and the tabs corresponding to non-selected XJLinks will remain disabled until tests finish or are stopped. If a new XJLink is plugged into your machine while tests are running, it will get its own tab on the main testing screen, however the tab will remain disabled until the group has finished.
If your project’s options require user entered serial numbers for the boards under test, these can be entered for the whole group on the pop-up dialogue at the beginning of testing. If the Runtime dialogues are enabled, the pop-up window at the end of testing will again show results for the whole group. Summary statistics for the currently running group are also shown at the bottom pane next to the Run/Stop buttons; these are reset when new tests start.

[…] This post highlights the new Independent mode of testing introduced in XJRunner from version 2.3. Group mode was covered in an earlier entry. […]